Step 1:
- Download img. file, formatter and disk imager
- Install applications & unzip files
Step 2: Format
 |
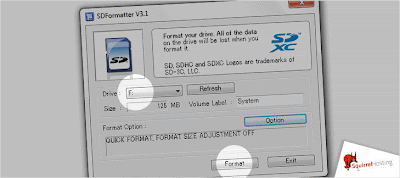
| Open SD Formatter |
 |
| Select correct drive and click format |
 |
| You will be asked to confirm format, click OK |
 |
| You will be prompted not to remove drive, click OK |
 |
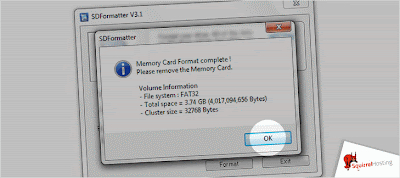
| Format complete, click OK |
Open Win32 Disk Imager
 |
| Select image file downloaded earlier and click "write" |
 |
| Confirm write, click OK or Yes |
 |
| OpenELEC XBMC will now install |
 |
| Write Complete! Done! Now just pop into your Raspberry Pi and follow booting instructions!
If you intend on overclocking I recommend opening drive in windows explorer, opening config.txt file and deleting all text. Save the file and exit and continue to booting instructions. (Removing the text is more convenient in wordpad than it is in the terminal.
If installing via MAC or Linux, follow these instructions.
|
Is It To Mount, or Not To Mount?
The Raspberry Pi can be either mounted to the back of your HDTV via a VESA mount or can be put on your entertainment station via one of the many cases.
Watch this video for the assembly instructions for any PiBlow case and VESA mount.
The Raspberry Pi can be either mounted to the back of your HDTV via a VESA mount or can be put on your entertainment station via one of the many cases.
Watch this video for the assembly instructions for any PiBlow case and VESA mount.
No comments:
Post a Comment